
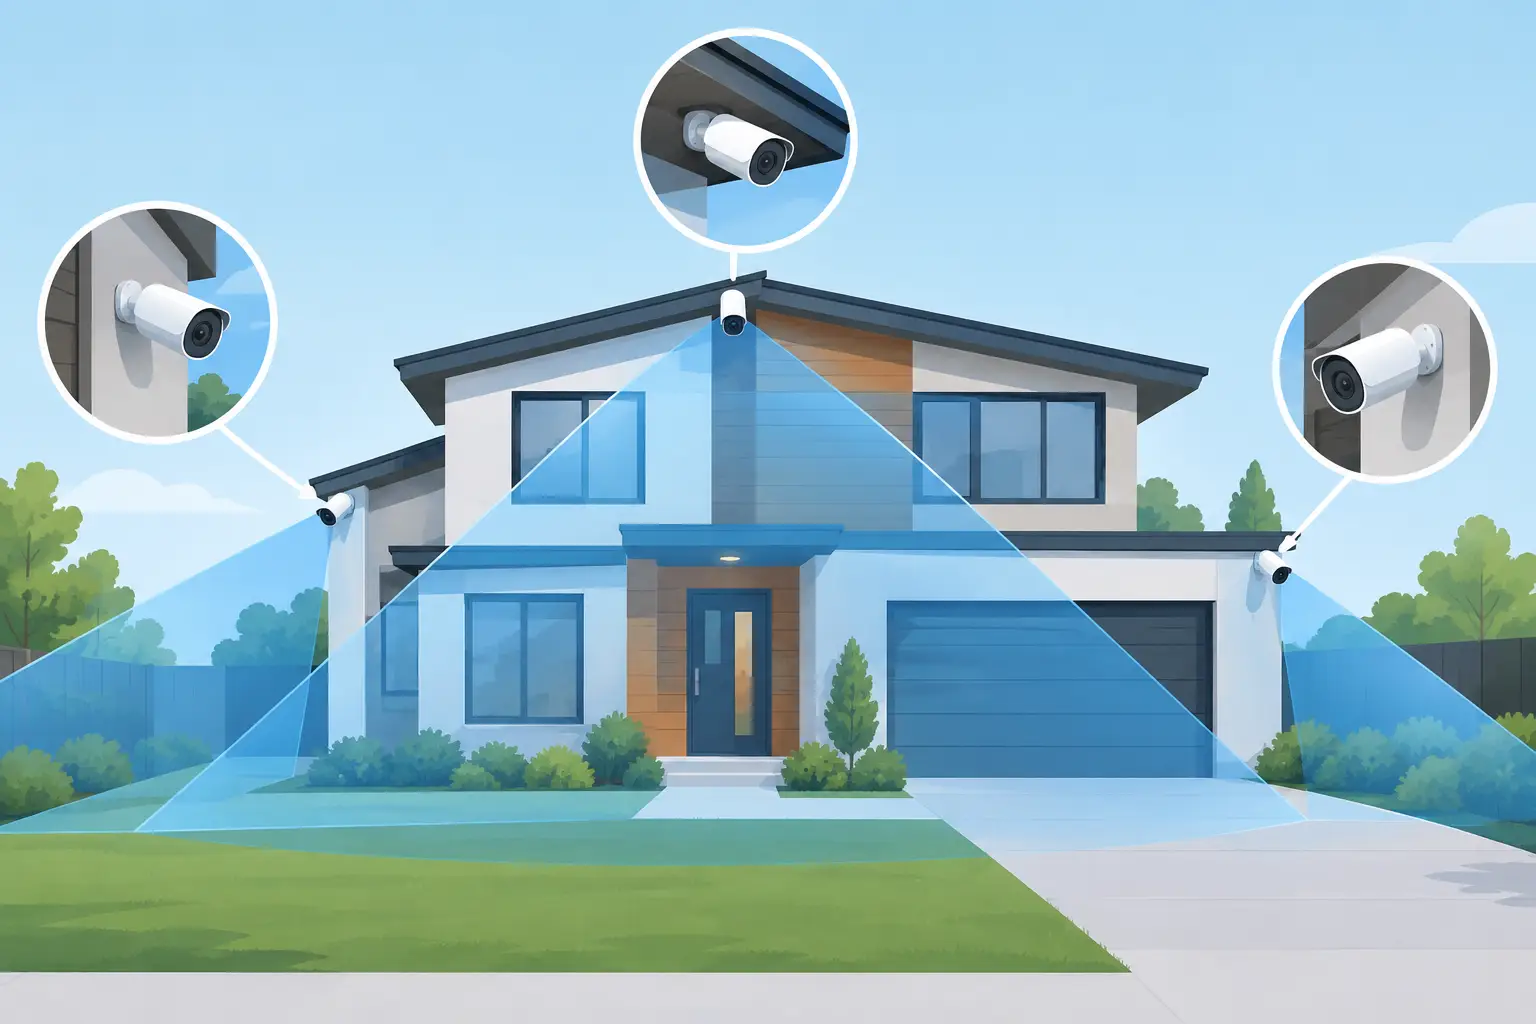
A security camera can be expensive and still miss the one detail that matters: a face at the front door, a vehicle leaving a driveway, or someone entering through a side gate. Knowing how to position security cameras properly is what turns a system from a visual deterrent into a useful security tool. The aim is not to record every inch of your property. It is to get clear, reliable footage at the places where people, vehicles, and valuables are most likely to move.
For homeowners, landlords, and business owners, a sensible camera plan starts with the property itself. Entry points, blind corners, parking areas, cash or stock locations, and access routes all deserve more attention than wide, empty spaces.
Start With What You Need to See
Before choosing a mounting point, decide what each camera is meant to achieve. A camera above a front door has a different job from one watching a loading area or a backyard gate. If the goal is identification, the camera needs a closer, more direct view of a person’s face. If the goal is to monitor activity across a driveway or yard, a wider view may be more useful, even though faces appear smaller.
Think through the most likely routes around the property. At a home, this normally includes the front door, rear door, side access, garage, driveway, and any gates. At a rental property, shared entrances, parking spaces, bin areas, and outbuildings may also need coverage. For a small business, include customer entrances, staff-only doors, delivery doors, register areas, storage rooms, and parking lots.
Do not rely on one wide-angle camera to do every job. Wide views are useful for context, but they often do not provide enough detail to identify someone at a distance. It is usually better to pair a general overview camera with a closer camera covering the key approach or doorway.
How to Position Security Cameras at Entrances
Doors are the first priority because they are the most common points of entry and exit. Position a front-door camera so it captures visitors approaching, standing at the door, and leaving. A video doorbell can work well here, but it may not cover a driveway, side path, or porch area on its own.
Mounting height matters. For most exterior cameras, around 8 to 10 feet from the ground is a practical starting point. This is high enough to make tampering harder, while still low enough to capture usable facial detail. Mounting a camera too high creates a view of hats, hair, and the tops of heads rather than faces.
Angle the camera slightly downward and across the route people use. Avoid pointing it straight down from above a doorway where possible. A side angle that catches someone before they reach the door often produces better identification footage. Make sure porch lights, signs, or overhangs are not blocking the view.
Cover Side and Rear Access Properly
Side passages and rear doors are easy to overlook, especially on homes where the front of the property feels well protected. These areas can be more private and less visible from the street, which makes them worth covering.
Place cameras where they can see the full length of a side path or the approach to a gate, rather than only the gate itself. For a rear yard, consider a camera facing the back door and another covering the main route through the yard if the space is large or has sheds, garages, or separate access points. A camera near an exterior light can be helpful, but check that the light does not shine directly into the lens at night.
Avoid Backlight, Glare, and Poor Night Views
A camera facing directly toward the sun can produce washed-out images for part of the day. Before final installation, look at the proposed view in the morning, afternoon, and evening. If the lens faces a low sun, bright security light, reflective window, or vehicle headlights, faces and license plates may be lost in glare.
Where possible, point cameras away from direct sunrise or sunset. If this cannot be avoided, choose equipment with suitable wide dynamic range settings and test the results on site. The camera image on a phone during daylight is not the full story. Night performance is just as important.
Infrared night vision can be affected by nearby walls, soffits, gutters, and shiny surfaces. If the camera is mounted too close to a wall or under a low overhang, infrared light may bounce back into the lens and create a hazy image. Keep the lens clear of obstructions and leave enough space around it for the night illumination to work as intended.
Motion lighting can improve color footage and act as a deterrent, but placement needs care. A bright light aimed into the camera can make the scene harder to see. Ideally, lighting should illuminate the person or area being watched, not the lens.
Choose Height and Angles That Produce Evidence
The best camera position balances coverage, detail, and protection from tampering. A very high camera can show a large area, but the footage may be poor for identification. A low camera may provide a better angle, but it is easier to cover, damage, or steal.
For doors and gates, use a closer view where a person naturally passes through a narrow area. For driveways, place the camera so vehicles move across the frame rather than directly toward or away from it. Side-to-side movement often gives the camera longer to capture useful details.
License plate capture is particularly dependent on angle, distance, lighting, and vehicle speed. A general driveway camera may show that a car arrived, but it may not read the plate clearly. If plate identification is a priority, use a dedicated camera position with a tighter field of view and test it under daytime and nighttime conditions.
Avoid placing every camera in the same corner of the building. If someone approaches from that direction or disables one unit, the whole system can lose coverage. Overlapping views at key entrances provide a better record of events and help confirm what happened when one camera is blocked or has poor light.
Check for Blind Spots Before Installation
Walk the site as though you were an intruder, visitor, delivery driver, or employee. Look for areas hidden by fences, hedges, parked vehicles, bins, sheds, and building corners. Seasonal changes matter too. A view that is clear in winter can be blocked by leaves and growth in summer.
Inside a business, consider tall shelving, displays, open doors, and areas behind counters. Cameras should cover entrances and valuable stock without being aimed so high that they only record the tops of aisles. In offices, reception areas and access-controlled doors are often more useful locations than general workspaces.
Use the camera app or monitor to check each planned view before fixing equipment permanently. Have someone walk through the scene at a normal pace. Can you see their face? Is the image clear at night? Does motion recording start early enough? This simple test catches problems that are difficult to spot from a ladder.
Respect Privacy and Use Cameras Sensibly
Security cameras should protect your property without unnecessarily recording your neighbors, public areas, or private spaces. Aim cameras within your own boundaries wherever possible. If a small part of a public sidewalk or shared access area must be visible, use privacy masking features to block out windows, neighboring yards, or other sensitive areas.
Never install cameras in places where people reasonably expect privacy, such as bathrooms, changing areas, or private living spaces. Landlords and business owners should also make sure occupants, staff, and visitors are informed about camera use where required. Clear signage is often sensible, particularly for commercial premises.
Audio recording has additional legal and privacy considerations. If you do not need it, turning it off can be the simplest approach. Keep recordings secure with strong passwords, two-factor authentication where available, and regular software updates.
Plan Power, Recording, and Maintenance
Camera placement is not only about the view. Each unit needs reliable power, a stable connection, and a practical route for cabling where applicable. Wireless cameras can be convenient, but thick walls, metal structures, and distance from the router can weaken the signal. They also need batteries charged or replaced, which can be easily forgotten on cameras mounted high up.
Wired systems are often a better choice for larger properties, businesses, or places where continuous recording matters. They can provide a more dependable connection and avoid the ongoing task of maintaining batteries. The right option depends on the building layout, how many cameras are needed, and how important uninterrupted recording is to you.
Set recording zones and motion sensitivity carefully. If a camera constantly records passing traffic, moving branches, or pets, important alerts can get buried. Trim vegetation, clean lenses regularly, and review footage after any changes to lighting or landscaping.
A well-positioned camera should give you confidence without becoming something you have to think about every day. If you are unsure whether a planned view will actually identify a person or cover a vulnerable access point, it is worth getting professional advice before any holes are drilled. BS Electrical can help design and install a camera system that suits the property, the risks, and the way you use the space – done properly, first time.